
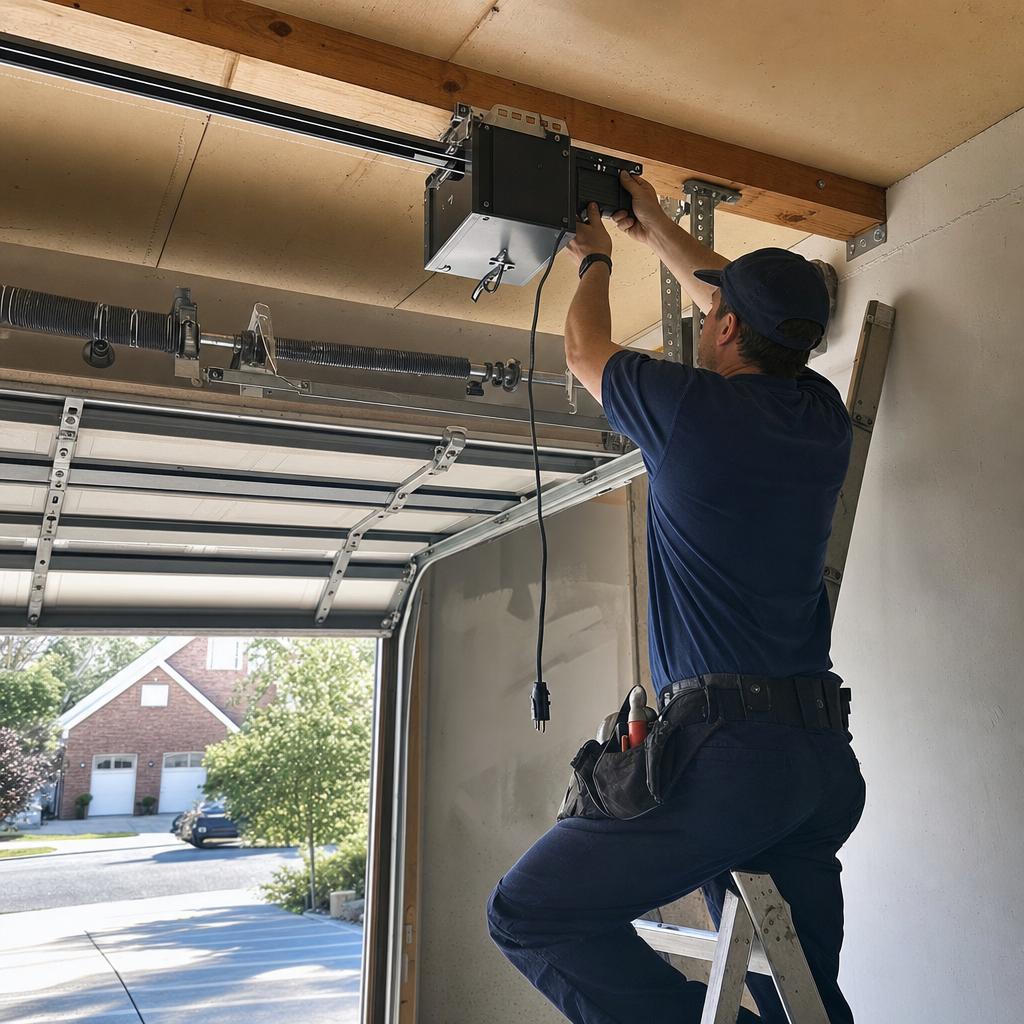
How to Program a Garage Door Opener in Reading, PA — From Fixed-Code Legacy Units to Modern Rolling-Code Systems
Programming a garage door opener in Reading typically takes 2–5 minutes if your unit has a colored “Learn” button (rolling-code, post-2005), but requires a completely different process involving DIP switches if you have a pre-2005 fixed-code opener — and in Reading’s older rowhouses, we’ve found roughly one in three “broken” remotes are actually just mismatched to the wrong protocol. If you’re stuck in a Centre Park twin or South Side alley garage with a remote that “kind of works sometimes,” call us at (833) 324-1505 and Joseph Taylor can walk you through identification over the phone, or come sort it out same-day.
Why Reading’s Old Housing Stock Makes Programming Tricky
Reading’s neighborhoods — Callowhill, Oakbrook, the South Side, Centre Park — are packed with 1900–1945 brick rowhouses and twins where the garage was bolted on decades after the house was built. In the Schuylkill River valley’s freeze-thaw cycles, we’ve replaced openers that have cycled through three or four owners, each leaving behind a mismatched remote in the glove box. The previous resident’s LiftMaster remote won’t talk to your inherited Genie unit, and that YouTube tutorial showing a smooth “press Learn, press remote” sequence assumes you have a rolling-code system that didn’t exist in most of these alley garages until the mid-2000s.
Here’s the split we see on service calls: about 60% of Reading’s active openers are modern rolling-code units with Learn buttons, but the remaining 40% are legacy fixed-code systems — especially in converted carriage houses off Penn Street and the narrow alleys behind the Centre Park historic district. You cannot program a rolling-code remote to a fixed-code opener, and trying will just eat your afternoon. Joseph Taylor, Owner & Lead Technician at Matrix Garage Door Repair Reading, grew up off Hampden Boulevard and has spent 14 years sorting out exactly these mismatches in the same neighborhoods.
Fixed-Code vs. Rolling-Code: What You’re Actually Working With
Before you touch any buttons, you need to know which generation of opener is mounted to your garage ceiling. This single identification step eliminates 90% of DIY programming failures we get called to fix.
Fixed-Code Openers (Pre-2005, Common in Reading’s Older Homes)
Look for a receiver box — usually a small plastic module near the motor unit or even mounted separately on the wall — with a row of tiny sliding switches labeled 1 through 8 or 1 through 12. These are DIP switches. Your remote has matching switches inside its battery compartment. Programming means matching the switch positions exactly, not pressing any “Learn” button. If your opener lacks any colored Learn button and instead has this mechanical switch array, you’re in fixed-code territory.
- Visual cue: Motor unit manufactured before 1993, or brand names like older Craftsman, Raynor, or pre-2000 Genie models
- Remote requirement: Must be the same brand and frequency (typically 300–400 MHz) — universal remotes rarely work reliably
- Security limitation: Fixed codes can be captured by code-grabbers; these systems are genuinely obsolete
Rolling-Code Openers (Post-1993, Standard Since 2005)
Look for a colored button — purple, red/orange, green, yellow, or — on the motor unit’s back or side. This is the Learn button. Each press generates a new encrypted code that your remote captures. The remote and opener then cycle through billions of code combinations in sync, making interception practically impossible. LiftMaster’s Security+ and Security+ 2.0, Chamberlain’s equivalent systems, and modern Genie Intellicode all use this protocol.
| Learn Button Color | Frequency/Protocol | Compatible Remote Types |
|---|---|---|
| Yellow | Security+ 2.0, 310/315/390 MHz tri-band | MyQ, 893MAX, 890MAX, 895MAX |
| Purple | Security+ 315 MHz | 371LM, 373LM, 953CD, 950CD |
| Red/Orange | Security+ 390 MHz | 971LM, 973LM, 81LM, 61LM |
| Green | Billion Code 390 MHz (older rolling) | 81LM, 61LM, 971LM |
In Reading’s humidity-driven rust environment — summer valley moisture hits hard in unventilated alley garages — we’ve seen Learn buttons corrode to the point they don’t register presses. If your button feels mushy or doesn’t click, that’s a service call, not a programming error.
Programming a LiftMaster or Chamberlain Opener in Reading
These brands dominate the post-2005 installs we’ve done in Wyomissing and the newer Muhlenberg builds, but we’re increasingly called to replace them in Reading’s core rowhouses where the original fixed-code unit finally died. Here’s the actual sequence:
- Locate the Learn button on the motor unit — back or side, under a light cover on some models
- Press and release the Learn button; the adjacent LED will glow steadily for 30 seconds
- Within 30 seconds, press and hold the button on your remote that you want to program
- Release when the motor unit lights blink or you hear two clicks
- Test immediately — if the door doesn’t respond, the LED timed out or the remote isn’t compatible
For a HomeLink system in your vehicle — critical in Reading’s dense neighborhoods where you don’t want to fumble for a remote on a narrow alley — the process differs slightly. Most HomeLink units need to be cleared first (hold the two outer buttons until the LED flashes), then trained using a two-step process that sometimes requires a compatibility bridge for Security+ 2.0. We’ve had Centre Park customers burn an hour on this before realizing their 2014 sedan’s HomeLink module predates tri-band support. If the bridge is required, it’s a $30–$60 part; we stock them because this comes up regularly in Reading’s older-vehicle, older-home combination.
Garage Door Opener Installation in Reading, PA runs $250–$550 if you’re replacing an incompatible unit, with same-day availability when Joseph’s route allows — and when the owner shows up, the job gets done right.
Programming a Genie or Craftsman Opener
Genie Intellicode and Craftsman AssureLink systems use similar rolling-code logic but different button sequences. Genie units typically have a “Program Set” button rather than a colored Learn button, and Craftsman units vary by manufacturing era — some were built by Chamberlain (use their protocol), others by Genie or Wayne Dalton.
For Genie Intellicode:
- Press and hold the Program Set button until the round LED turns blue, then release
- Press the remote button once; the long purple LED will blink
- Press the same remote button again to confirm; both LEDs will go out
For Craftsman with purple Learn button (Chamberlain-built):
- Same as LiftMaster/Chamberlain sequence above
For older Craftsman with DIP switches:
- Open remote and receiver, match switch positions 1–9 or 1–12 exactly
- Position 1 must match Position 1, and so on — orientation (up/down or +/-) must be identical
Here’s where 14 years of brand-specific knowledge matters: we once got a call from an Oakbrook homeowner who’d bought three “universal” remotes trying to hit a 1997 Craftsman DIP-switch system. The opener worked fine — the remotes were all rolling-code-only. Joseph carries compatible fixed-code remotes on the truck for exactly this scenario, but we’ll also tell you honestly if the opener’s at end-of-life and replacement makes more sense than chasing obsolete parts.
The HomeLink Problem in Reading’s Alley Garages
This is the specific scenario generic guides miss entirely. In Reading’s urban core — the narrow alleys behind Callowhill and the South Side where garages were carved from former carriage houses — you often can’t easily step out of your vehicle to use a clip-on remote. The wall is 18 inches from your mirror. HomeLink integration isn’t a luxury; it’s how you actually use the door.
Programming HomeLink to an older fixed-code opener requires a training remote (the original or a compatible replacement) because HomeLink can’t generate the fixed code on its own — it has to “learn” it from a transmitting remote. For rolling-code systems, the process is:
- Clear HomeLink (hold outer buttons until flashing)
- Hold your working remote 1–3 inches from HomeLink buttons, press both simultaneously until HomeLink flashes rapidly
- Press the Learn button on your motor unit, return to vehicle within 30 seconds, press the programmed HomeLink button three times slowly to complete rolling-code sync
If your opener predates 2000 and lacks any Learn button, HomeLink compatibility is unlikely without a retrofit receiver — typically a $120–$250 add-on that we can install same-day. In Reading’s freeze-thaw environment, we also check whether the opener mounting bracket is secured to anything structural; we’ve seen units screwed into crumbling plaster over lath in converted carriage houses, and no programming fix will hold if the opener physically shifts.
When Programming Isn’t the Fix: The Honest Cutoff
If I can’t fix it straight, I’ll tell you that before I touch it. Here’s where we stop troubleshooting over the phone and recommend a visit:
- No Learn button, no DIP switches, no response to power cycle: The logic board has failed. Opener repair runs $120–$320 if the part’s available; many pre-2000 boards are discontinued.
- Repeated successful programming, then failure within days: Usually a failing logic board or interference from LED bulbs installed in the opener socket — a known issue with certain bulb brands that pulse on the same frequency.
- Opener runs but door doesn’t move: That’s a mechanical issue — stripped gear, broken coupler, or disconnected trolley. Not programming.
- Remote works at 10 feet but not from the alley: Antenna wire is damaged or the receiver sensitivity is degrading. In Reading’s older brick garages, we’ve also seen the metal lath in plaster walls act as a partial Faraday cage.
For a unit manufactured before 1993 — no photo eyes, no auto-reverse, no rolling code — replacement isn’t upselling; it’s safety compliance and actual security. A Best Garage Door Opener in Reading, PA upgrade ensures modern protection. A new opener installation in Reading runs $250–$550 depending on horsepower, rail length for non-standard rowhouse openings, and whether we need to sister in a steel header for structural integrity. The brick arch headers on converted carriage-house openings in Centre Park and the South Side often bear load from above, and a purely suburban installer unfamiliar with Reading’s urban stock might miss this until the opening shifts.
FAQs
Remote programming is typically included free when we’re already on-site for service, or runs $75–$125 as a standalone call in the Reading area. If you need a new remote or a HomeLink compatibility bridge, compatible remotes range $30–$60 and bridges $30–$60. Call (833) 324-1505 for an exact quote — estimates are free, and Joseph Taylor can often diagnose your opener generation over the phone.
The most common cause in Reading is a protocol mismatch — trying to program a rolling-code remote to a fixed-code opener, or vice versa. The second most common is a failed logic board that accepts programming but doesn’t retain it, which we see frequently in units exposed to Reading’s valley humidity without ventilation. Check whether your opener has DIP switches (fixed-code) or a colored Learn button (rolling-code) before starting any programming sequence.
Yes — Matrix Garage Door Repair Reading offers same-day service when routing allows, and Emergency Garage Door Opener in Reading, PA response beyond standard hours because a broken door doesn’t wait for business hours. We’ve programmed openers at 8 p.m. in South Side alleys and replaced failed units on Sunday mornings in Callowhill. Call (833) 324-1505 to check current availability.
If your opener was manufactured before 2000 and lacks a Learn button, replacement is usually the smarter spend — parts are obsolete, there’s no auto-reverse safety feature, and fixed-code remotes are easily intercepted. For post-2005 rolling-code units, repair at $120–$320 often extends useful life another 5–7 years. We’ll give you the honest math on both options when we see the unit.
Need a Hand With Your Opener in Reading?
If you’d rather have it looked at, Matrix Garage Door Repair Reading offers a no-pressure assessment in Reading — call (833) 324-1505. Joseph Taylor handles the full service spectrum from Garage Door Opener programming and repair to complete new installations, and with 14 years, one standard, we’ve earned nearly 800 verified reviews from homeowners who got the top of the shop, not an entry-level crew, on every job.
Written by Joseph Taylor, Owner & Lead Technician at Matrix Garage Door Repair Reading, serving Reading, PA.